v2ray server setup tutorial

Get your server up to date:

1apt update && apt upgrade -y

Also install curl and socat:

1apt install curl socat -y

Install Acme Script

Download and install the Acme script for getting a free SSL certificate:

1curl https://get.acme.sh | sh

Get Free SSL Certificate

Set the default provider to Let’s Encrypt:

1~/.acme.sh/acme.sh –set-default-ca –server letsencrypt

Register your account for a free SSL certificate. In the next command, replace xxxx@xxxx.com by your actual email address:

1~/.acme.sh/acme.sh –register-account -m xxxx@xxxx.com

Obtain an SSL certificate. In the next command, replace host.mydomain.com by your actual host name:

1~/.acme.sh/acme.sh –issue -d host.mydomain.com –standalone

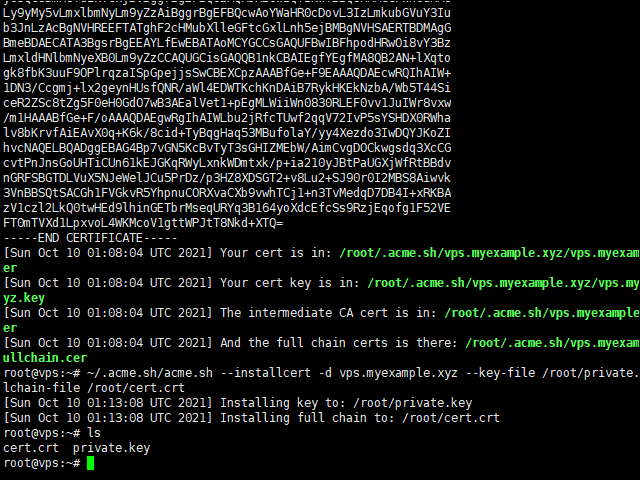
After a minute or so, the script terminates. On success, you will receive feedback as to the location of the certificate and key:

1
2
3
4
Your cert is in: /root/.acme.sh/host.mydomain.com/host.mydomain.com.cer
Your cert key is in: /root/.acme.sh/host.mydomain.com/host.mydomain.com.key
The intermediate CA cert is in: /root/.acme.sh/host.mydomain.com/ca.cer
And the full chain certs is there: /root/.acme.sh/host.mydomain.com/fullchain.cer

You cannot use the certificate and key in their current locations, as these may be temporary. Therefore install the certificate and key to a permanent location. In the next command, replace host.mydomain.com by your actual host name:

1~/.acme.sh/acme.sh –installcert -d host.mydomain.com –key-file /root/private.key –fullchain-file /root/cert.crt
Install certificate and key issued by Acme script

Run the X-UI Install Script

Download and run the one-click install script provided by the developer:

1bash <(curl -Ls https://raw.githubusercontent.com/vaxilu/x-ui/master/install.sh)

Common Panel Commands

From the command line, you can control the server with various commands:

CommandEffect
x-uiDisplay the management menu
x-ui startStart the X-UI panel
x-ui stopStop the X-UI panel
x-ui restartRestart the X-UI panel
x-ui statusView X-UI status
x-ui enableSet X-UI to start automatically after boot
x-ui disableCancel X-UI boot from start
x-ui logView X-UI log
x-ui updateUpdate the X-UI panel
x-ui installInstall X-UI panel
x-ui uninstallUninstall X-UI panel

First Time Login

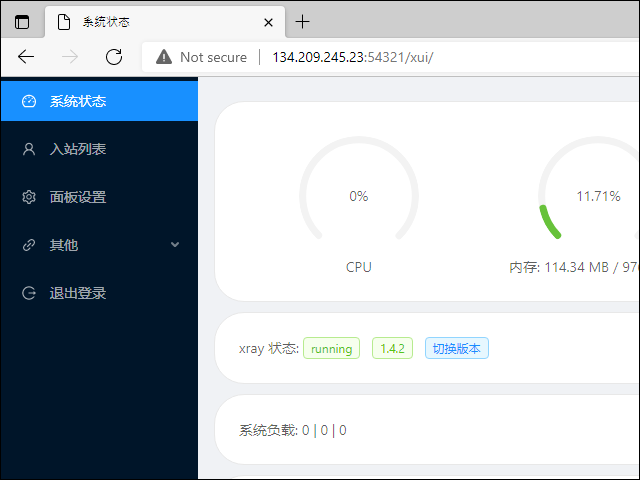
You can get to the X-UI panel on your PC by opening a browser and typing your server IP address and port 54321. For example:

1http://123.45.67.89:54321

By default, the login user name is admin, and the password is also admin.
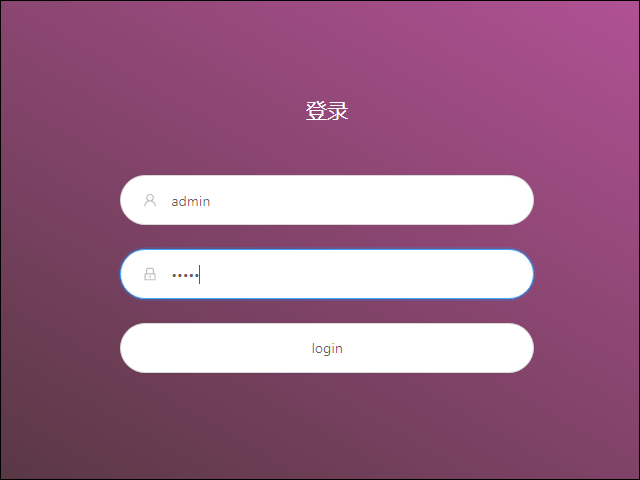
First-time login to X-UI panel

Side Menu

After you have logged in, the side menu offers these options:

ChineseEnglish
系统状态System status
入站列表Inbound list
面板设置Panel settings
其他Other
退出登录Sign out
Side menu on X-UI panel

Enable HTTPS on Panel

You will notice that, at first, you used plain text HTTP to reach the panel. This is not secure.

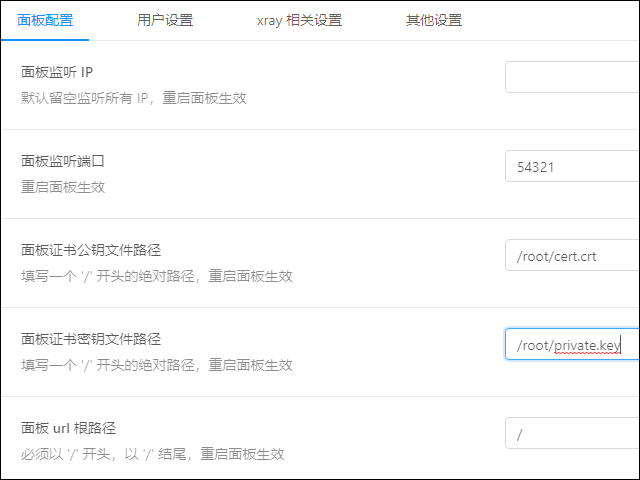
To enable HTTPS, choose 面板设置 (Panel settings).

You will need to specify your certificate and key.

1
2
3
4
面板证书公钥文件路径
填写一个 ‘/’ 开头的绝对路径,重启面板生效
Panel certificate public key file path
Fill in an absolute path starting with’/’, restart the panel to take effect

Fill in /root/cert.crt.

1
2
3
4
面板证书密钥文件路径
填写一个 ‘/’ 开头的绝对路径,重启面板生效
Panel certificate key file path
Fill in an absolute path starting with’/’, restart the panel to take effect

Fill in /root/private.key.

Specifying certificate and key in X-UI panel settings

Save these options.

Now in your SSH session issue the command:

1x-ui restart

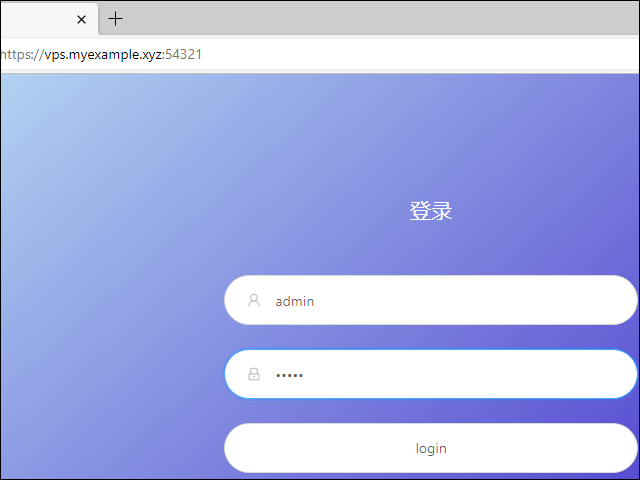
Now you can reach the panel using HTTPS. For example:

1https://host.mydomain.com:54321
HTTPS login to X-UI panel

Change Admin Password

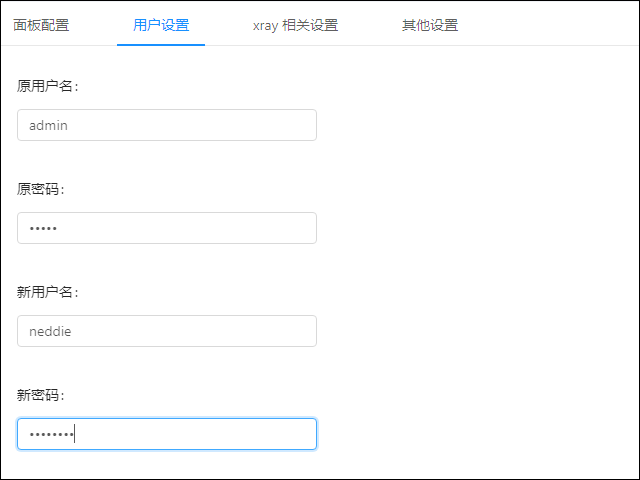
The default admin user name admin and password admin are the same for all installations. This is not secure. Input the old values of admin and admin, and choose new, unique values:

ChineseEnglish
原用户名Original user name
原密码Old password
新用户名New user name
新密码New password
X-UI panel change user name and password

Save the new values.

Sign out, then sign in again with the new user name and password.
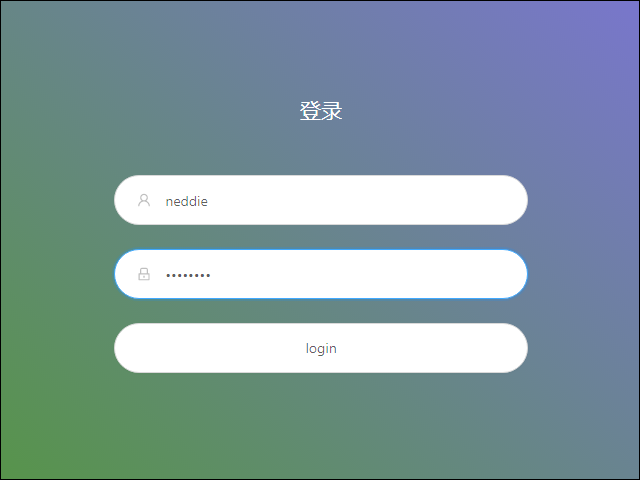
HTTPS login with new user name and password

Add VLESS+XTLS Xray User

We are going to add an inbound user account using VLESS and Xray. VLESS is an an updated version of the older Vmess protocol. After several developers found flaws in Vmess protocol and showed that the Vmess protocol can be detected by deep packet inspection or DPI, VLESS was developed. (Note that it is plain Vmess that can be detected; Vmess+WS+TLS is still secure and supports the use of a CDN.) Xray core was developed as an alternative to the older V2Ray core. According to the Xray developers, Xray is more stable, better for UDP gaming, and 30% faster than V2Ray. XTLS speeds up TLS by reducing double-encryption.

On the side menu, select 入站列表 (Inbound list).

Click the plus sign to add a new inbound user.

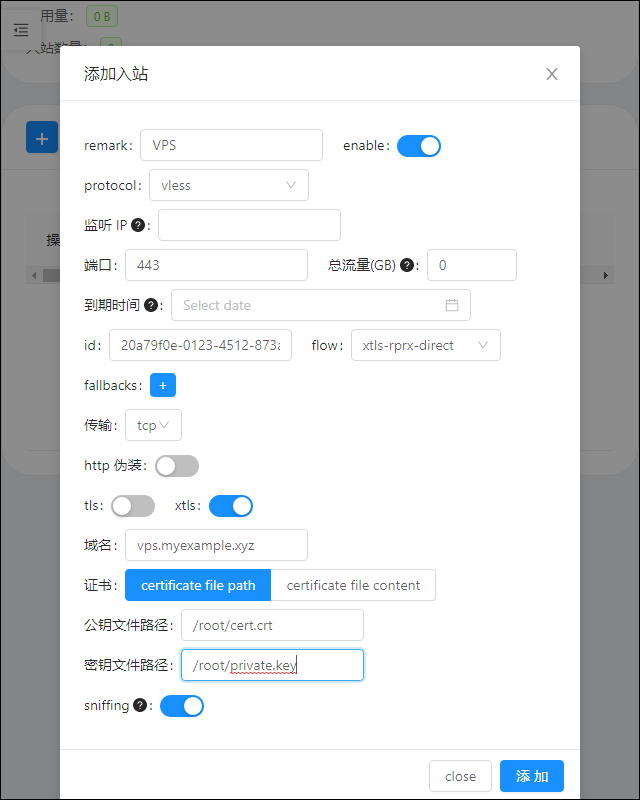
The 添加入站 (Add inbound) box appears.

Enter fields as follows.

FieldContents
RemarkPut a unique and meaningful description
EnableOn
Protocolvless
监听 IP Listening IPLeave blank
端口 Port443
总流量(GB) Total bandwidth (GB)0 means unlimited
到期时间 Expiry dateBlank
IdLeave the generated UUID as is
Flowxtls-rprx-direct
FallbacksNone
传输 Transmissiontcp
HTTP 伪装 masqueradingOff
TLSOff
XTLSOn
域名 Domain namePut your host name, e.g. host.mydomain.com
公钥文件路径 Public key file path/root/cert.crt
密钥文件路径 Key file path/root/private.key
SniffingOn
Adding a new VLESS+XTLS user

Save the new user.

Click the 操作 (operating) button at the start of its row to display the QR code for the new user.
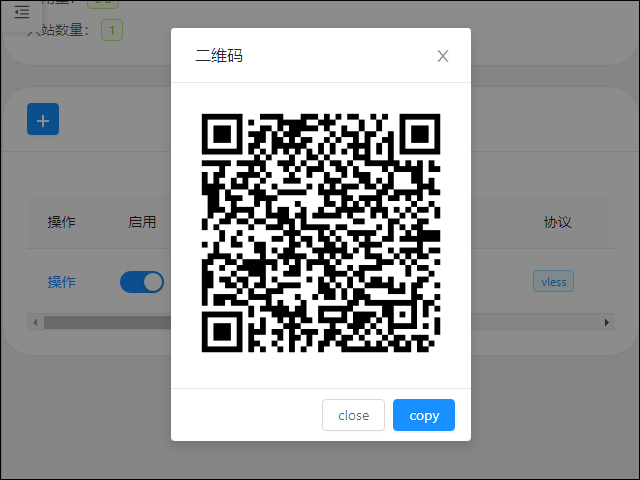
Displaying QR code in X-UI panel

Client

Clients are available for Android, iOS, Windows, macOS, and Linux. Examples are v2rayNG, Shadowrocket, and Qv2ray.

Add the profile in the QR code to your client.
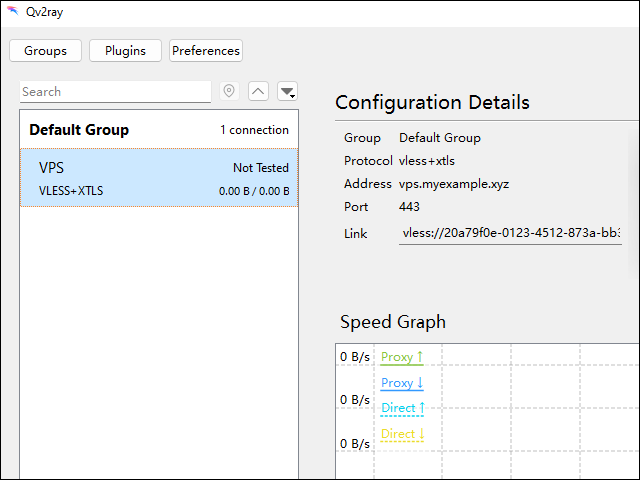
Example of Qv2ray client

You can check that your connection is working by opening a browser and going to https://whatismyipaddress.com.
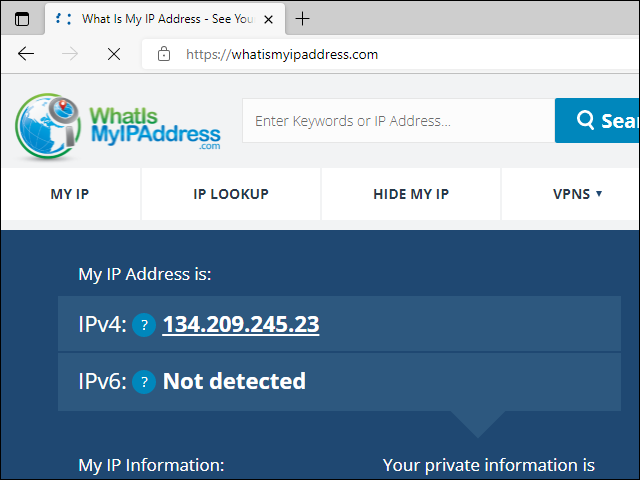
whatismyipaddress.com

Android , Windows , ios v2ray free app fair – NapsternetV

cloud vps Bahrain , Egypt , Philippines , Thailand , Taipei China , Dubai UAE , Malaysia

1 Cores up to 16 core
2GB RAM up to 32 GB
10 GB SSD up to 500 GB
100Mbps Uplink
1 TB Data Traffic up to 6 TB


location
Sofia Bulgaria – Jeddah Saudi Arabia
Istanbul Turkey – HanoiVietnam
Bangkok Thailand – Phnom Penh Cambodia
Hong Kong China – Taipei China
Ho Chi Minh Vietnam – Johannesburg South Africa
Dhaka Bangladesh – Manila Philippines
Singapore – Dubai UAE
Riyadh Saudi Arabia – Kuala Lumpur Malaysia
Cairo Egypt – Bahrain

Starting From 40.99$

Firmware IPOLLO V1 MINI CLASSIC ETC MINER (130MH)

MEET THE QUIETEST ETC MINER! 

iPollo V1 Mini Classic is designed to mine ETC without any crypto miner app. It is a plug and run ASIC miner with 130Mh/s hash power with only 104W power consumption. All you need to do is turn on the power and connect to a crypto mining pool.  With this mini size of ASIC etherium classic miner, you will be able to save on storage spaces with more hash powers.

Product Specification

  • Hashrate: 130MH (±10%)
  • Consumption: 104w (±10%)
  • Efficiency: 0.8j/Mh
  • Algorithm: Ethash/ETC
  • VRAM: 3.6GB

Power Supply

  • Power supply AC input voltage: 100-240V
  • Power supply AC Input Frequency Range: 50-60Hz
  • Power supply AC Input current: 5Amp

Hardware Configuration

  • Network connection mode: RJ45 Ethernet 10/100M, 2.4Ghz WIFI
  • Miner Size: 179*143*90mm
  • Net weight: 2.5kg

Environment Requirements

  • Operation temperature: 0-25c
  • Storage temperature: -20-70c
  • Operation humidity(non-condensing): 10-90%

Firmware >>> 38.40 |  47.55 | 59.71

90% discount Shared hosting

Shared Hosting plan

Promotion Code : hosting-90off

FREE Shared SSL Certificate
Control DirectAdmin
Daily and weekly backup
DDoS Protection

FREE Cpanel License

Create a ticket after purchase.

France cloud vps (VPS8GB,VPS16GB,VPS32GB)

aws cloud vps (4 GB to 32 GB RAM)

Bahrain cloud vps (1 GB to 32 GB RAM)

Install remote desktop connection on Ubuntu (XRDP)

Install Gui

sudo apt-get install lubuntu-desktop

sudo apt-get remove unity unity-2d

sudo apt-get remove unity unity-2d-places unity-2d unity-2d-panel unity-2d-spread unity-asset-pool unity-services unity-lens-files unity-lens-music unity-lens-applications gir1.2-unity-4.0 unity-common indicator-sound indicator-power indicator-appmenu libindicator6 indicator-application evolution-indicator indicator-datetime indicator-messages libnux-1.0-0 nuxtools

Install XRDP

sudo apt-get install xrdp

lxsession -e LXDE -s Lubuntu

echo "lxsession -s Lubuntu -e LXDE" > ~/.xsession

sudo service xrdp restart

Finally you can connect with remote desktop connection.

Install SteamCMD

Downloading SteamCMD

Windows

1. Create a folder for SteamCMD.

For example

C:\steamcmd

2. Download SteamCMD for Windows: https://steamcdn-a.akamaihd.net/client/installer/steamcmd.zip

3. Extract the contents of the zip to the folder.

Linux

Create a user account named steam to run SteamCMD safely, isolating it from the rest of the operating system. Do not run steamcmd while operating as the root user – to do so is a security risk.

1. As the root user, create the steam user:

useradd -m steam

2. Go into its home folder:

cd /home/steam

Package from repositories

1. It’s recommended to install the SteamCMD package from your distribution repositories, if available:

Ubuntu/Debian

sudo apt install steamcmd

 Note:If you are using a 64 bit machine you will need to add multiverse

 sudo add-apt-repository multiverse
 sudo dpkg --add-architecture i386
 sudo apt update
 sudo apt install lib32gcc1 steamcmd 

RedHat/CentOS

yum install steamcmd

Arch Linux

git clone https://aur.archlinux.org/steamcmd.git
cd steamcmd
makepkg -si

2. Link the steamcmd executable:

ln -s /usr/games/steamcmd steamcmd

Docker

If your server is running Docker, you can simply use:

docker run -it --name=steamcmd cm2network/steamcmd bash

steamcmd.sh location: /home/steam/steamcmd

This image can be used as a base image for Steam-based dedicated servers. Example: https://hub.docker.com/r/cm2network/csgo/

You can find the associated Docker Hub page here: https://hub.docker.com/r/cm2network/steamcmd/

Manually

1. Before you begin, you must first install the dependencies required to run SteamCMD:

Ubuntu/Debian (x86-64)

sudo apt-get install lib32gcc1

RedHat/CentOS (x86-64)

yum install glibc.i686 libstdc++.i686

2. As the root user, escalate to the steam user:

su - steam

If you’re not logging in as root and you instead use sudo to perform administration, escalate to the steam user as follows:

sudo -iu steam

3. Create a directory for SteamCMD and switch to it.

mkdir ~/Steam && cd ~/Steam

4. Download and extract SteamCMD for Linux.

curl -sqL "https://steamcdn-a.akamaihd.net/client/installer/steamcmd_linux.tar.gz" | tar zxvf -

5. Install tmux and/or screen for easy server management

sudo apt-get install tmux screen -y;

macOS

1. Open Terminal.app and create a directory for SteamCMD.

mkdir ~/Steam && cd ~/Steam

2. Download and extract SteamCMD for macOS.

curl -sqL "https://steamcdn-a.akamaihd.net/client/installer/steamcmd_osx.tar.gz" | tar zxvf -

Running SteamCMD

On first run, SteamCMD will automatically update and enter you into a Steam> prompt. Type help for more information.

Windows

Open a Command Prompt and start SteamCMD.

cd C:\steamcmd
steamcmd

Linux/macOS

Open a terminal and start SteamCMD.

If you installed it using the package from repositories:

cd ~
steamcmd

If you installed it manually:

cd ~/Steam
./steamcmd.sh

SteamCMD Login

Anonymous

To download most game servers, you can login anonymously.

login anonymous

With a Steam account

Some servers require you to login with a Steam Account. Note:For security reasons it is recommended that you create a new Steam account just for your dedicated servers. Note:A user can only be logged in once at any time (counting both graphical client as well as SteamCMD logins).

login <username>

Next enter your password.

If Steam Guard is activated on the user account, check your e-mail for a Steam Guard access code and enter it. This is only required the first time you log in (as well as when you delete the files where SteamCMD stores the login information).

You should see a message stating that you have successfully logged in with your account.

Downloading an app

1. Start SteamCMD and log in.

2. Set your app install directory. (Note: use forward slashes for Linux/macOS and backslashes for Windows.)

force_install_dir <path>

e.g. a directory named cs_go inside the current directory:

force_install_dir ./cs_go/

For Windows: force_install_dir c:\cs_go\

3. Install or update the app using the app_update command (supplying a Steam Application ID). Please check here for the dedicated server list: Dedicated server list. To also validate the app, add validate to the command. To download a beta branch, use the -beta <betaname> option – for example, the HLDS beta branch is named beta and the SrcDS beta branch is named prerelease. Some beta branches are protected by a password; to be able to download from them, also add the -betapassword <password> option.

app_update <app_id> [-beta <betaname>] [-betapassword <password>] [validate]

HLDS is a special case: the App ID is always 90 and a mod must be chosen first. This is done by setting the app config option mod to the requested value.

app_set_config <app_id> <option_name> <option_value>

Example: Install and validate the Counter Strike: Global Offensive dedicated server:

app_update 740 validate

Example: Install and validate HLDS with Team Fortress Classic:

app_set_config 90 mod tfc
app_update 90 validate

Bug: HLDS (appid 90) currently requires multiple runs of the app_update command before all the required files are successfully installed. Simply run app_update 90 validate multiple times until no more updates take place.Example: Install and validate beta version of HLDS (Half-Life):

app_update 90 -beta beta validate

Example: install and validate beta version of the Counter Strike: Source dedicated server:

app_update 232330 -beta prerelease validate

Example: install and validate a private beta version of the Natural Selection 2 dedicated server (name alpha, password natsel):[beta name] is the name of the private beta branch[beta code] is the password for the private beta branch

app_update 4940 -beta alpha -betapassword natsel validate

3. Once finished, type quit to properly log off of the Steam servers.

quit

Validate

validate

Validate is a command that will check all the server files to make sure they match the SteamCMD files. This command is useful if you think that files may be missing or corrupted. Note:Validation will overwrite any files that have been changed. This may cause issues with customized servers. For example, if you customize mapcycle.txt, this file will be overwritten to the server default. Any files that are not part of the default installation will not be affected.

It is recommended you use this command only on initial installation and if there are server issues.

Supported Servers

A list of known servers that use SteamCMD to install is available on the Dedicated Servers List page. Note that any extra commands listed need to be executed before the app_update line.